How
PuTTY works as SSH Client
It acts as an SSH client as well as Telnet Client, and it is helpful to access your system remotely, for instance, you are using Ubuntu (it will act as a client), and you have another Ubuntu or Windows operating system (for server) that is connected to your Ubuntu system via a network. The server PC (either Ubuntu or Windows) must have an SSH server installed in it, and you can install PuTTY client in your Ubuntu system and can connect with the SSH server over a network.
In this guide, we will show you the possible ways and step-by-step procedures to install PuTTY on Ubuntu.
There are two ways to install PuTTY on Ubuntu:
- Using command line terminal of Ubuntu
- Using GUI of Ubuntu
How to install PuTTY on Ubuntu using terminal
The command-line interface of Ubuntu allows you to perform all the tasks that you can perform using the graphical interface; it seems difficult in the beginning but is very useful and user-friendly for Linux-loving users.
Firstly, open the terminal using “Ctrl+Alt+T” and use the command given below to update the repository:

It is always recommended to update the repository by getting the latest list of programs supported by Ubuntu. It is observed that you can also install the program without executing the above command, but it may result in getting the older version.
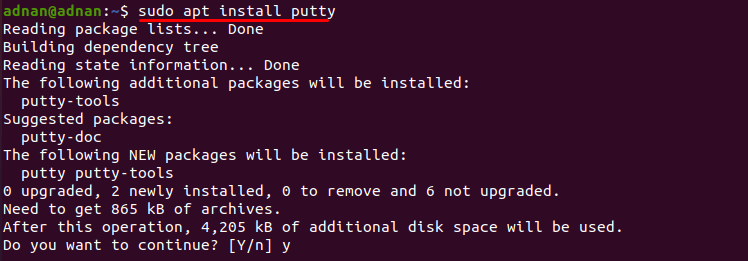
After that, use the following command to get the PuTTY on your Ubuntu:

The above command will install the PuTTY, and you can run it from the terminal with the help of the command mentioned below:

How to install PuTTY using Ubuntu Software center
You can use the GUI of Ubuntu to install the PuTTY; follow the simple steps described below:
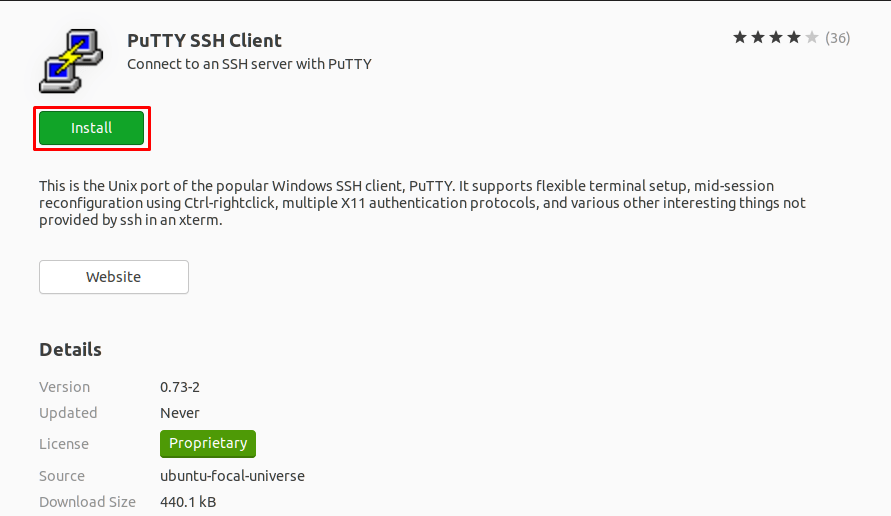
Step 1: Open your “Ubuntu Software Center” from the taskbar available on the desktop and search for “PuTTY” here. The search query will show multiple results; you must click on “PuTTY SSH Client” to continue:

Step 2: After clicking, you will notice a green “Install” button; click on this button to start the installation:

Step 3: The time you want to start the installation, the system will ask you to enter the user password, type your password and click on “Authenticate” to continue:

Once it is installed, you can find it from the applications menu that is available on the taskbar of the Ubuntu desktop. Click on the application tab and search or PuTTY in the search bar:

The search result will show the required program as shown in the image below:

How to remove PuTTY from your Ubuntu
If you want to remove the PuTTY from your Ubuntu, you can adopt any of the two ways mentioned below:
- Remove PuTTY using Ubuntu command line terminal
- Or use the graphical interface of Ubuntu
Using Ubuntu terminal: To remove the PuTTY from your Ubuntu, you can use the terminal of Ubuntu and execute the following command to remove the program from the system:
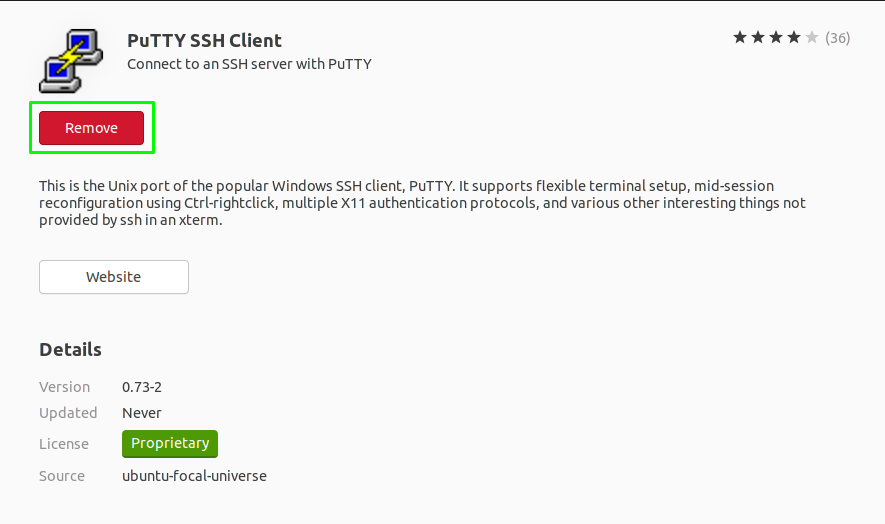
Using Ubuntu Software: Open “Ubuntu Software” and search for “PuTTY”; if the software is installed, a red “Remove” button will be displayed. Click on the “Remove” button to remove the tool:

Once you click on the button, it will ask you for confirmation, and again click on remove to continue:

After that, the system will ask to input the user password; type the password and click on “Authenticate” to start removing the package:

Conclusion
PuTTY is a free and open-source terminal emulator that supports various network protocols; among those protocols, Telnet and SSH are the most used. In this article, we have briefly outlined its installation process. The users can adopt two ways to install and the same number of routes to remove the package from the system. The graphical method looks interesting to follow. However, the command line users can follow the other first method to go for installation.
Discover more from Ubuntu-Server.com
Subscribe to get the latest posts sent to your email.


