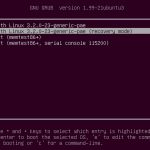
This feature is enabled by default in the newest Ubuntu versions. Due to this auto-update feature, sometimes users face different errors, so for example, when users login after updating the system, they see the error message like this:

for example, when users force reboots their system in updating procedure, then they get this error message:

Therefore, this automatic update feature helps keep your system up to date but is very annoying for some users. If you also find this feature irritating, read our article to understand the complete procedures to enable/disable unattended upgrades in Ubuntu.
But before we discuss the procedure, we want to give a brief answer on “is it good to disable auto-updates in Ubuntu?” Remember that it is a security-related feature, and Linux allows users to keep their systems up to date. So, it is not good to disable auto-updates because it keeps the system safe. In case you disable auto-updates in Ubuntu, then make sure to update your system manually for your system’s security.
How to Enable/Disable Unattended Upgrades in Ubuntu
We will describe two procedures that you can use to enable/disable auto-updates easily for more convenience.
Enable/Disable unattended upgrades Using Command Line
There are multiple disable Unattended upgrades in Ubuntu using command lines, so ensure you use them correctly.
You need to edit the /etc/apt/apt.conf.d/20auto-upgrades for disabling unattended upgrades in Ubuntu. So, open the Linux terminal and execute the following command line:
After executing the command, change the directives of Update-Package-Lists from 1 to 0.
APT::Periodic::Unattended-Upgrade “1”;
In case you don’t an automatic update checking option, then change the directive like this:
In case you want to let your system check the regular update but don’t want to install them, then change the value from 0 to 1 like this:
APT::Periodic::Unattended-Upgrade “0”;
If you change the value of periodic::Unattended-Upgrade from 0 to 1, then your system will check the updates every day. After changing the value, the command will look like this:
APT::Periodic::Unattended-Upgrade “1”;
If you want to disable these automatic updates the right way, then run the below command in the terminal:
After executing the command, change the select No and press Enter button to disable unattended upgrades.

For removing this feature permanently, use the below command line:
This command will not harm other software or features of your Ubuntu system.
Once you disable unattended upgrades, then make sure to run these commands to update your system manually:
$ sudo apt upgrade
Enable/Disable unattended upgrades Graphically
Open the software & updates from the main menu search button.
In the software & updates option, go to the Updates section and find “Automatically check for updates“. You will see that it is already set to daily, and it is a by-default selection.

Change this by default option to Never so that it will turn the automatic updates download to never, and your system will not download it again.


Conclusion
This is how you can easily disable unattended upgrades in Ubuntu, and we aim to provide a different procedure to do it easily. As we have mentioned, it is a by default enabled feature that keeps your system up to date, but it is also annoying for many users due to the errors. You can disable these auto-updates but update your system manually as it is essential to maintain your data security in the system.
Discover more from Ubuntu-Server.com
Subscribe to get the latest posts sent to your email.


