Every Linux user should know how to add and/or create a user as well as how to delete a user. This is important since on a fresh installation there is only one root user and most Linux distros are multi-user operating systems. Sometimes, adding a user is required to perform special tasks without any side effect on the system stability as long as the permissions are not too strong.
A root user is free to assign the required privileges he sees fit to any user. This will depend on the tasks to be carried out by the new users.
In Ubuntu it is possible to add users via the terminal, .i.e. the command line or via GUI. In the article we will cover both.
A – User creation
1 Adding a new user using command line
In order to create or add a new user, there are two commands: adduser and useradd. adduser, written in Perl, is an interactive front-end utility and an interface to useradd command.
The useradd command however is rather a low level tool used to add users.
Using the adduser tool, you can create a new user called newuser as follows:
sudo adduser newuser
How to add user in ubuntu | how to add user in Linux
You will be prompted with a set of questions that are mostly optional except the password. Do not forget to set a strong password.
You can also see from the snapshot above that the command will actually set up a new home directory for the new user as well as copy files from the source folder /etc/skel to the new home directory.
The home directory will be like the private space for the new user, i.e., he will be able to write, delete and edit files and folders within it.
In order for the new users to have administrative privileges, they will need to be added to the sudo group as follows:
sudo usermod -aG sudo newuser
Needless to say that the members of the sudo group are granted with sudo privileges by default.
2 Adding a new user using GUI
If you are not at ease with the command line, you can add a new user via GUI. This is very simple to do:
- Open up the activities screen and put in the word “users” in the search field as shown below:
Then click on “Add or remove users and change your password”. - Once the new window pops up, click on the Unlock button on the top right hand corner. Do provide your user and password when being asked.
Once you have provided your user credentials, the Unlock button will now show up as an Add User button:
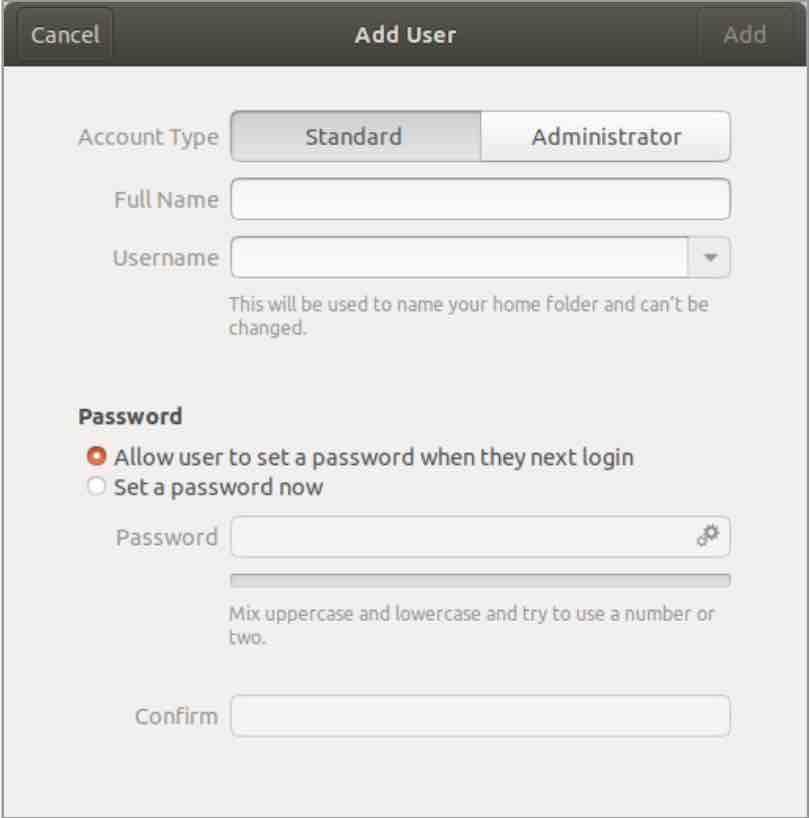
- Now click on the Add User button : this will display a dialog box as shown below :
Ubuntu add user – GUI
- Depending on the nature of the new user’s privileges, you can select either a standard or administrator. You can also provide additional information. Once completed, click on the Add button on the top right hand corner which will become green once you fill in some fields :
You may be interested to read: How to create a user in Ubuntu/Debian: ‘useradd’ command usage, a beginner’s guide
B User deletion
Much like user creation, it is possible to either delete a user via command line or via GUI. We will see both below.
1 – User deletion using the terminal
In order to delete a user account, you can either choose the low level command userdel or the much appreciated user friendly command deluser .
To keep the user files when deleting the user account, run the command:
sudo deluser newuser [ubuntu delete user]
Delete user Ubuntu | delete user Linux
In order to delete the user’s home directory and mail spool as well, use the flag –remove-home as follows:
sudo deluser –remove-home username
1 – User deletion using GUI
- Open up the activities screen and put in the word “users” in the search field as shown below:
Then click on “Add or remove users and change your password”. - Once the new window pops up, click on the Unlock button on the top right hand corner. Do provide your user and password when being asked.
Once you have provided your user credentials, the Unlock button will now show up as an Add User button:
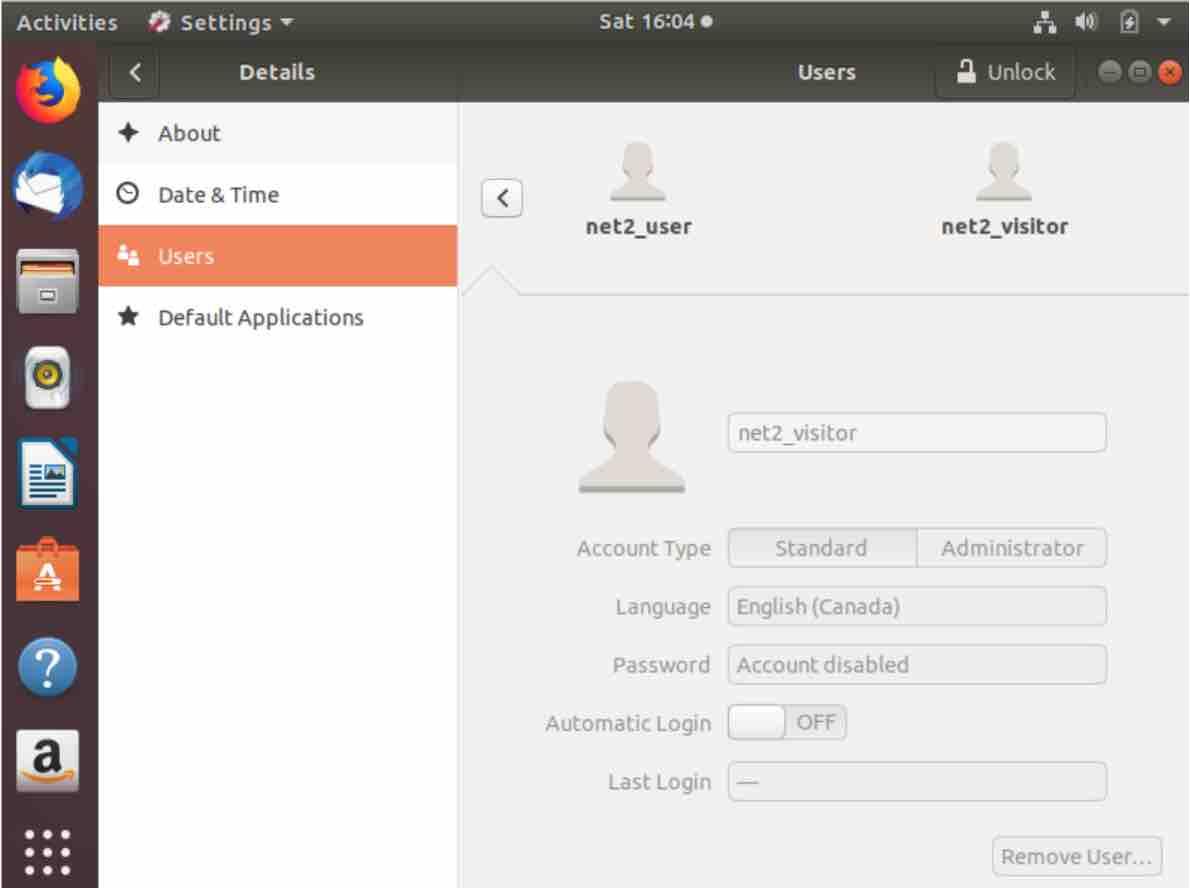
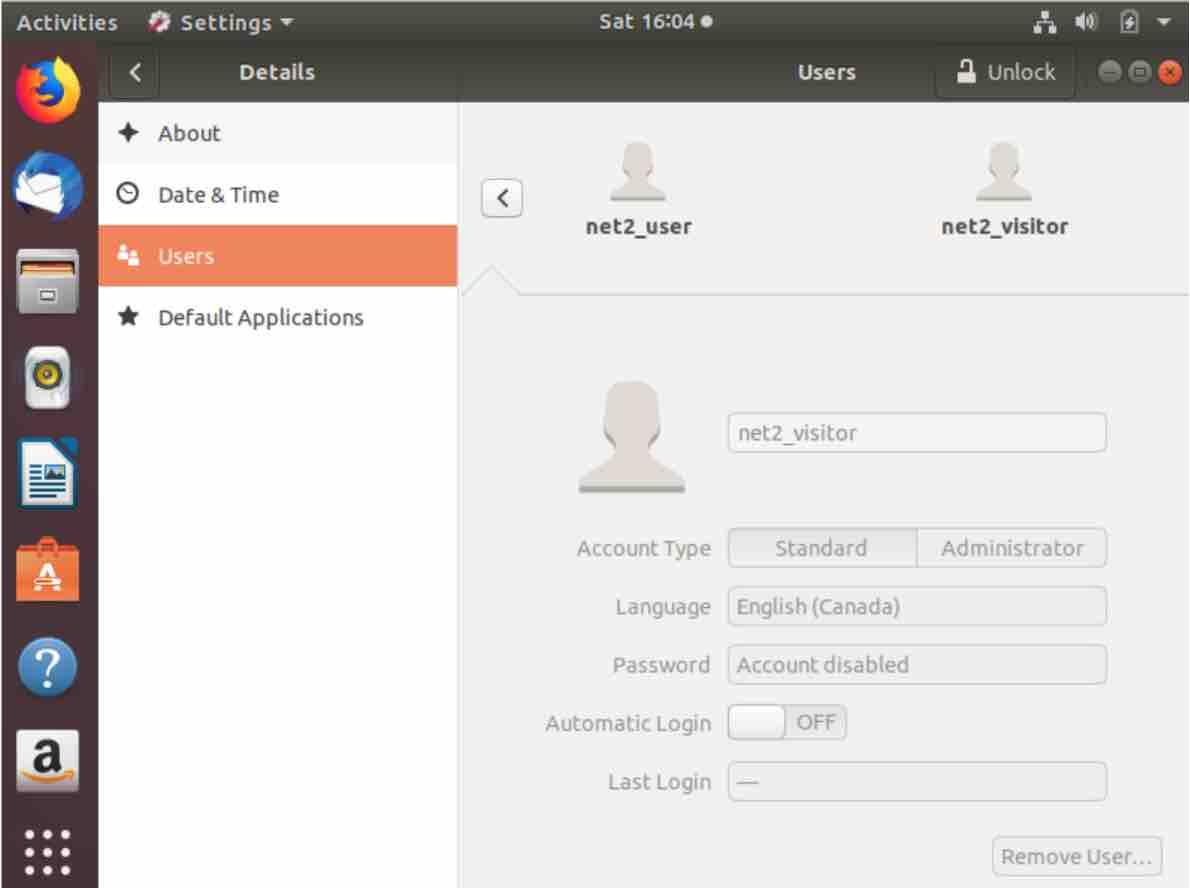
- Select the username to delete. A red Remove User button will appear on the bottom right corner.
Remove user ubuntu
- Click on the button Remove User..You will then be asked if you would like to keep or remove the user home directory.
- To remove the user, just click on either of these buttons.
C – How to grant Sudo privileges to users
The new user would need sudo access if he wants to execute some commands or tasks which require root permissions.
1 – using visudo
This can be achieved using the visudo command which shows the relevant configuration file in nano editor.
Now type in the following command in your terminal :
sudo visudo
This will show up the following file content:
Look up the line (selected above) which has the characters below:
root ALL=(ALL:ALL) ALL
Just under this line, insert the following :
your_new_user ALL=(ALL:ALL) ALL
So that you will have two lines which read like :
root ALL=(ALL:ALL) ALL
your_new_user ALL=(ALL:ALL) ALL
Create sudo user ubuntu
For each user you wish to add sudo access, you need to proceed in the same way. Once done, save and close the file above. Hit CTRL-X , then Y to and finally ENTER to confirm.
The user you have just given sudo access will now have the ability to invoke commands which require administrative privileges.
You may be interested to read: How to create a Sudo user on Ubuntu
2 – Using command
You can also add a user to a sudo group via the command line by invoking the command below :
sudo usermod -aG sudo newuser
Note: In order not to lock yourself out of the system, it is recommended to use the command visudo to edit the sudoers file – This is just a precaution in case you accidentally write something which is not correct in the sudoers file.
visudo will actually backup your changed file to a temporary folder and will only overwrite the original sudoers file if the altered file has no errors.
Conclusion:
Now you should be able to add and delete users on Ubuntu and similar distros. Remember to provide users with the appropriate privileges that match the tasks they are entitled to do.
The post How to add and delete users on Ubuntu/Debian appeared first on net2.
Discover more from Ubuntu-Server.com
Subscribe to get the latest posts sent to your email.


